
- All
- Product Name
- Product Keyword
- Product Model
- Product Summary
- Product Description
- Multi Field Search
English


Views: 0 Author: Site Editor Publish Time: 2026-08-22 Origin: Site


Building a reliable boundary requires more than simply unrolling wire and driving posts. Structural integrity depends heavily on correct material selection. Precise tensioning and proper corner bracing play equally vital roles. Whether securing a residential garden or enclosing a large agricultural perimeter, you must understand specific installation mechanics. This essential knowledge prevents premature sagging, rust, and eventual structural failure. A poorly constructed barrier quickly becomes a physical liability. We must manage tension effectively to ensure long-term performance. Environmental factors also demand careful planning before you break ground.
This guide covers the end-to-end process of planning, material evaluation, and construction. You will learn how to choose appropriate posts and hardware for your project. We will explore advanced techniques for navigating uneven terrain without compromising security. You will also discover how to avoid the most common installation pitfalls. By following these practical steps, you can build a secure boundary tailored perfectly to your exact requirements.
Material Selection Dictates Method: Installation steps vary significantly between welded wire (rigid, best for level gardens) and woven wire (flexible, ideal for livestock and contoured land).
Corner Strength is Critical: 90% of fence tension relies on corner and end posts; proper H-bracing is non-negotiable for long-term stability.
Tensioning Tools Matter: Using proper tensioners and a "come-along" winch prevents the most common DIY failure: sagging over time.
Terrain Adapts: Uneven land requires specific installation methods (stepping vs. racking) to maintain security without warping the mesh.
Selecting the right materials forms the foundation of a successful installation. You cannot apply a one-size-fits-all approach to perimeter security. Different animals, landscapes, and security needs require specific types of metal mesh. We generally divide these materials into two primary categories: welded and woven.
Welded wire features cross-sections fused together via heat. Manufacturers create a highly rigid grid. It provides a cost-effective solution for flat gardens and low-pressure perimeters. However, it remains prone to breaking under heavy animal impact. The rigid joints cannot flex. When a large animal leans against it, the welds often snap. It serves best for keeping small pets in or keeping moderate pests out.
Woven wire, commonly known as a field fence, uses knotted joints instead of welds. These specialized knots allow the mesh to flex under pressure and return to its original shape. This flexibility makes it ideal for agricultural use, large boundaries, and uneven terrain. The material absorbs impacts safely without suffering permanent structural damage.
Comparison Chart: Welded vs. Woven Wire
Feature | Welded Wire | Woven Wire (Field) |
|---|---|---|
Joint Construction | Heat welded | Knotted / Wrapped |
Flexibility | Low (Rigid) | High (Flexible) |
Best Terrain | Flat, even ground | Sloped, uneven ground |
Impact Resistance | Low to Moderate | High (Absorbs force) |
Primary Application | Gardens, light enclosures | Livestock, large perimeters |
Your posts act as the skeleton of your boundary. Corner and end posts bear the heaviest burden. They must handle immense lateral tension. You must use heavy-duty wood for these critical junctions. Pressure-treated 4x4s or 6x6s work exceptionally well. You must set these anchor posts deep in concrete to bear the pulling force.
Line posts serve a different function. They simply hold the mesh upright and support its vertical weight. You can space them evenly, typically 8 to 12 feet apart. Metal T-posts offer a popular, durable choice for line posts. They drive easily into the ground. Lighter wood posts also work well for a traditional aesthetic. Combining wood corners and metal T-post lines offers an excellent balance of strength and efficiency.
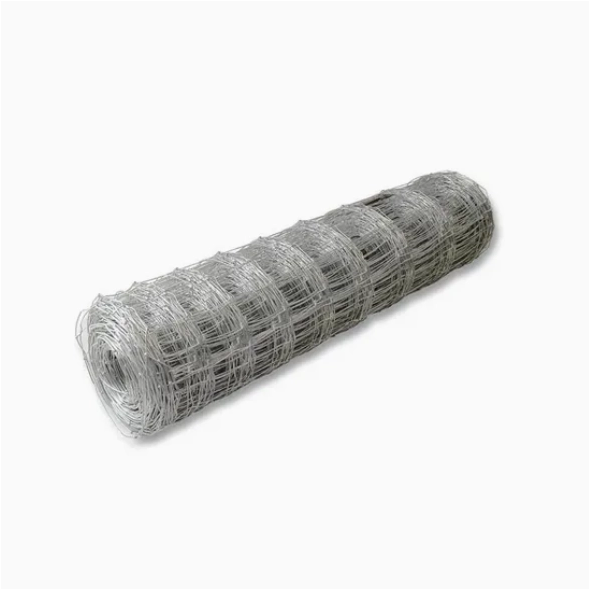
Gathering the right supplies beforehand prevents frustrating delays mid-project. Installing a wire mesh fence requires specific hardware to manage tension safely. You cannot substitute proper stretching tools without risking a sagging, compromised perimeter.
Rolls of metal mesh (calculate your total linear footage and add a 10% overage for splicing and errors).
Heavy-duty U-staples (fencing staples) specifically sized for wood posts.
T-post clips for securing the mesh to any metal line posts.
High-tensile smooth wire for building your corner braces.
Concrete mix for securing all anchor and gate posts.
Post hole digger or mechanical auger.
Heavy-duty T-post driver.
Specialized fencing pliers and heavy-duty wire cutters.
"Come-along" winch and a stretcher bar (absolutely crucial for tensioning woven varieties).
Level, string line, marking paint, and a long measuring tape.
Safety gear, including heavy leather gloves and eye protection.
Following a strict sequence ensures structural stability. Rushing the layout or skipping bracing steps guarantees future failure. We outline the exact methodology below to help you achieve a professional-grade result.
You must begin by verifying your exact property lines. Building on a neighbor's land causes severe legal headaches. Check your local zoning laws and HOA restrictions regarding boundary heights and materials. Different municipalities enforce strict setback rules.
Next, you must call your local utility locators before you dig a single hole. In the US, dialing 811 triggers a free underground utility check. Hitting a buried gas or electrical line poses severe danger. Once cleared, stake your corners accurately. Run a tightly pulled string line between these stakes. This string maps your exact perimeter and guides your post placement.
Your corner posts do the heaviest lifting. Dig these holes well below your local frost line. In many regions, this means digging 24 to 36 inches deep. Bypassing the frost line allows winter soil heave to push your posts upward, destroying tension.
Install your heavy wood anchor posts perfectly plumb. Pour concrete into the holes and allow it to cure completely. After the concrete cures, you must construct "H-braces" at every corner and gate opening. An H-brace consists of two vertical posts connected by a horizontal post near the top. You then run a diagonal tension wire from the top of the bracing post to the bottom of the corner post. You twist this diagonal wire tight. This structure handles the immense pulling force of the stretched mesh, preventing the corner from leaning inward.
With your corners secure, mark your line post spacing along the tightly pulled string line. Keep your spacing consistent. Drive your metal T-posts or set your wood line posts exactly on these marks. Ensure the faces of the posts perfectly align with the string. The face is the flat side where the mesh attaches. A misaligned post creates a wave in your finished perimeter. Use a post level frequently. A crooked line post compromises vertical support and looks unprofessional.
Always unroll the material along the outside of the boundary line. We call this facing the "threat" or pressure side. If livestock lean against the mesh from the inside, their weight pushes the metal against the posts. If you install it on the wrong side, their weight pulls the metal away from the staples, eventually popping them out.
When you reach the end of one roll, you must splice it to the next. Do not simply overlap them. Splice them by stripping the vertical stays back a few inches on both rolls. Take the exposed horizontal wires from the first roll and wrap them tightly around the vertical stay of the second roll. Use fencing pliers to twist the metal securely. A proper splice maintains continuous tension across the gap.
Secure one end of the mesh to your starting corner post. Wrap the material entirely around the post and staple it securely. Wrapping provides maximum hold. Next, move to the opposite end of the run. Do not pull it by hand. Attach a stretcher bar securely to the material. The stretcher bar distributes pulling force evenly from top to bottom.
Attach a come-along winch to your destination corner H-brace. Connect the winch cable to the stretcher bar. Slowly crank the winch. Pull until the material becomes taut and stands upright without sagging. Finally, fasten the taut mesh to your line posts. Use T-post clips for metal posts. Use U-staples for wood posts. Never drive U-staples fully flush against the metal. Leave a tiny gap. You must allow the material slight horizontal movement to absorb animal impacts safely.
Flat ground presents ideal working conditions, but real-world landscapes rarely cooperate. When you encounter hills, valleys, or steep drops, standard installation methods fail. You must adapt your approach based on the severity of the slope.
The racking method works best for moderate, even slopes. In this technique, the material follows the natural contour of the land. The top and bottom edges remain parallel to the ground, while the vertical stays lean slightly off-plumb to accommodate the hill. This method works exceptionally well with woven varieties. The knotted joints provide enough flexibility to rack the material without distorting the overall grid. Welded varieties generally cannot rack effectively without breaking.
You must use the stepping method for steep or highly irregular drops. In this approach, you keep the horizontal wires perfectly level, regardless of the ground slope. At each post, you cut the material and step it down to the next level. This creates a stair-step appearance along the top edge. However, stepping leaves large triangular gaps at the bottom of the downhill side. You must fill these gaps with earth, lumber, or additional scrap mesh to prevent animals from crossing the boundary.
Even experienced builders occasionally stumble. Identifying common pitfalls early saves immense frustration. Pay close attention to these frequent errors.
Skipping Corner Braces: Many builders underestimate tension forces. Skipping proper H-braces causes corner posts to lean inward within months. Once the corner leans, the entire perimeter sags irreversibly.
Over-tensioning Welded Wire: Woven varieties feature tiny crimps in the horizontal lines that expand under tension. Welded varieties lack this feature. Over-pulling rigid grids will snap the heat welds entirely. Pull welded rolls just tight enough to stand upright.
Stapling Too Tightly: Driving U-staples tight against the metal on line posts restricts natural expansion. Metal expands and contracts during temperature changes. If pinned too tightly, the material binds and eventually breaks. Always leave a fraction of an inch for movement.
Building a high-quality boundary serves as an exercise in tension management and material matching. Success relies on robust corner posts and appropriate stretching tools. We cannot overstate the importance of proper H-bracing and deep concrete footings. A well-planned perimeter requires careful terrain assessment before you install a single post.
Finalize your perimeter measurements today. Determine your local soil type to prepare for post-hole digging. Select the specific gauge and post materials that align perfectly with your unique security or agricultural requirements. Gathering your tools and mapping your utility lines sets the stage for a smooth, professional installation.
A: Corner and end posts should be buried at least 1/3 of their total length, which typically ranges from 24 to 36 inches. They must extend below the local frost line. This depth prevents winter soil heave from pushing the posts upward and compromising stability.
A: While possible for short, low-tension garden enclosures, installing stretched woven barriers safely requires at least two people. You need one person to safely operate the come-along winch while the other monitors tension and secures the mesh to the posts.
A: A properly installed, Class 3 galvanized perimeter can last 20 to 40 years. Lifespan depends heavily on climate conditions, humidity levels, and animal impact frequency. By contrast, a lighter Class 1 galvanized barrier typically lasts between 5 and 15 years before rusting.


